实现自动化,仅需一键!- 基于Windows Terminal的捷径

3k 词

起因

在连接到服务器时,不想操作太麻烦,在网上搜到了可以配置免密登录:

Windows下,使用

1
ssh-keygen

生成公钥id_rsa.pub和私钥id_rsa,存放在C:\Users\用户\.ssh中。

进入Linux中的.ssh目录下,将公钥信息追加在authorized_keys中。

然后就可以实现Windows免密登录了。

但是,还是需要先输入ssh xxx@xx.xx.xx.xx,非常不elegant。

查了网上也没查到简化这一步的方法(现在想来,其实用一个bat或者sh脚本就能实现(雾- -))。

修改Windows Terminal设置

翻了以下Windows Terminal的设置,发现左下角可以自行配置设置。
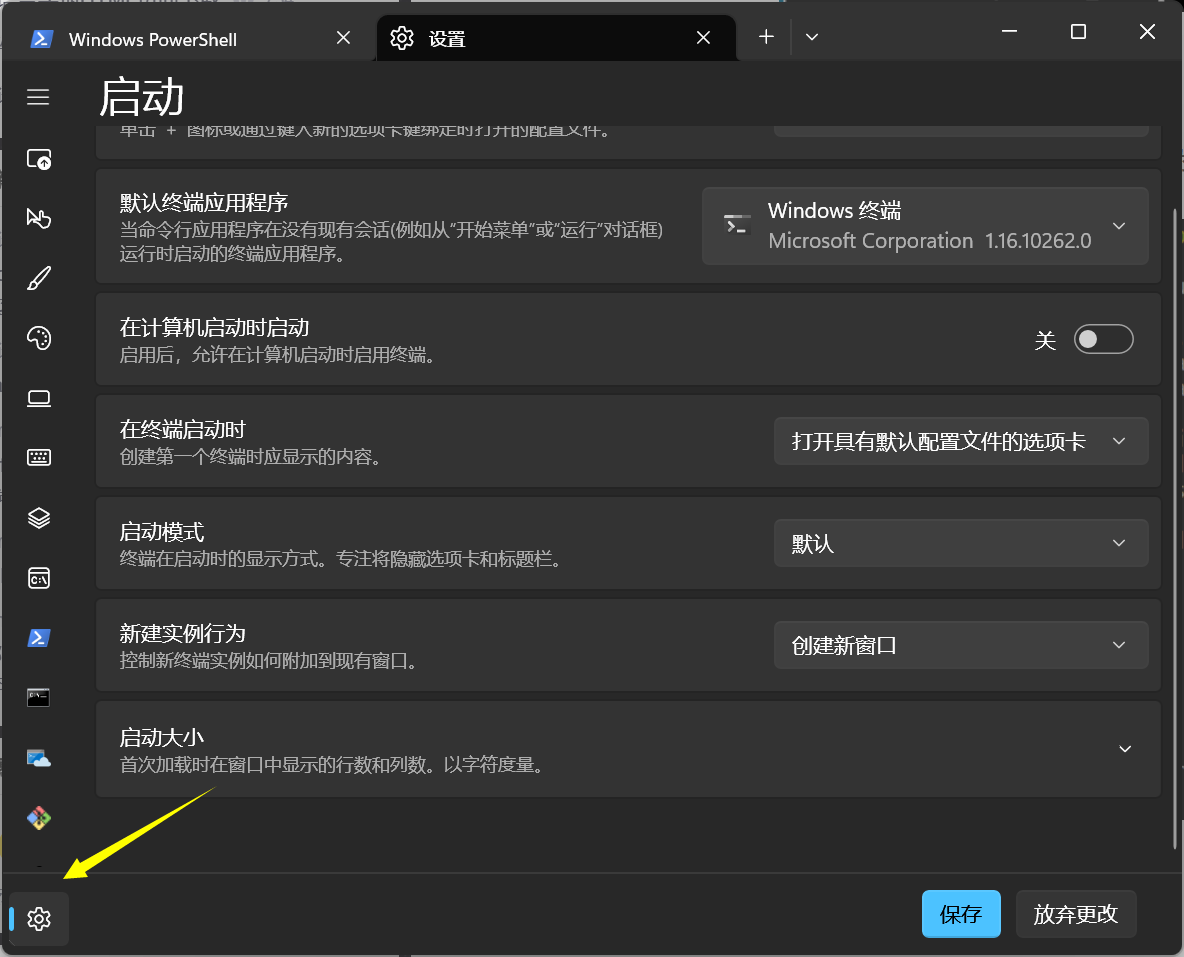
打开之后,就是一个json格式的设置信息(嗯,很有Microsoft的风格)

分析了一下之后,发现可以通过更改这里面的配置文件来实现类似于这种的快捷指令:
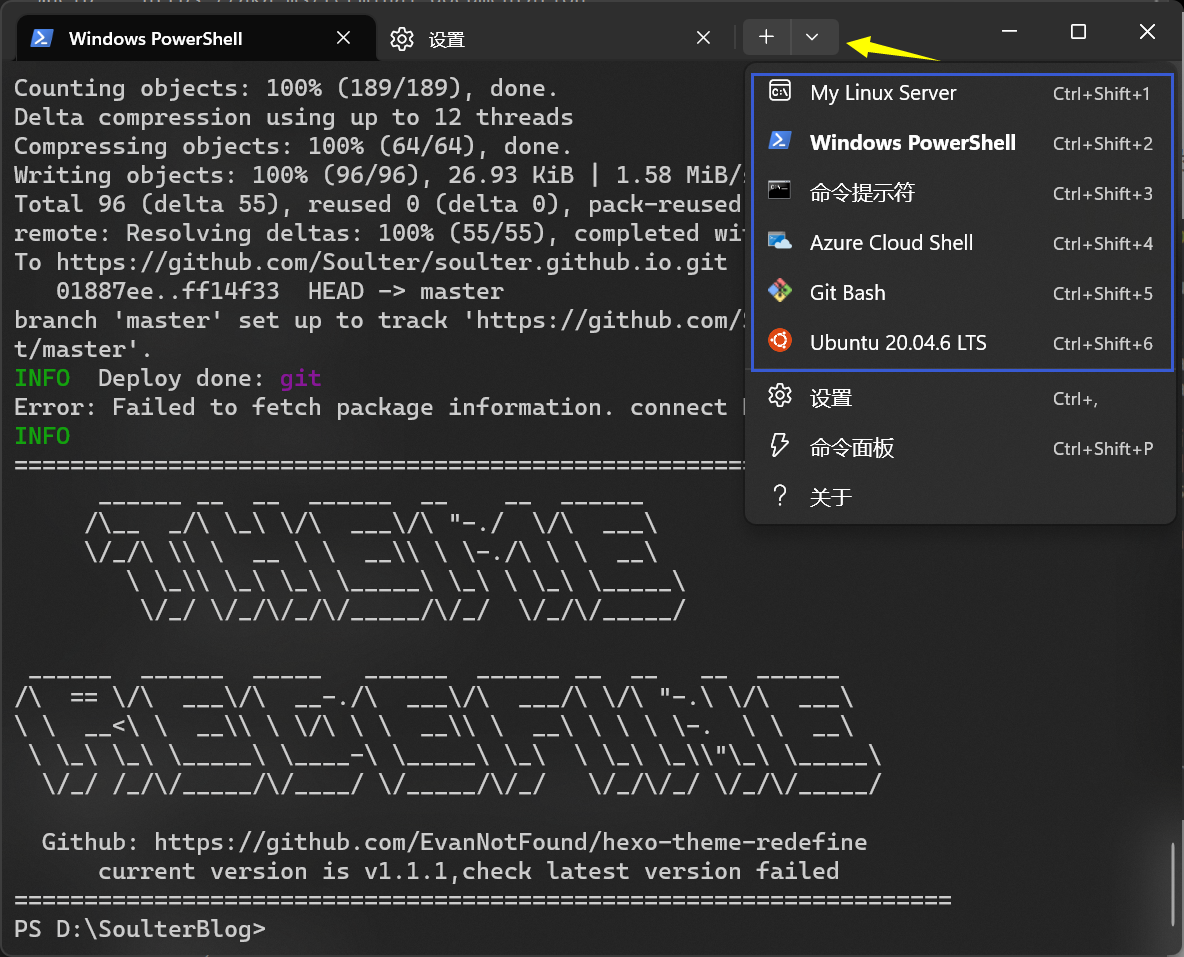
首先找到profiles字段,这个字段下有一个名为list的数组,存放的就是上面提到的快捷指令。可以看到,有Powershell, Git, CMD等常见的工具。

1
2
3
4
5
6
7
8
9
10
11
12
13
14
15
16
17
18
19
20
21
22
23
24
25
26
27
28
29
30
31
32
33
34
35
36
37
38
39
40
41
42
43
44
45
46
47
48
49
50
51
52
53
54
55
56
57
58
59
60
"profiles": 
{
"defaults":
{
"opacity": 54,
"useAcrylic": true
},
"list":
[
{
"commandline": "%SystemRoot%\\System32\\WindowsPowerShell\\v1.0\\powershell.exe",
"guid": "{61c54bbd-c2c6-5271-96e7-009a87ff44bf}",
"hidden": false,
"historySize": 9999,
"name": "Windows PowerShell"
},
{
"commandline": "%SystemRoot%\\System32\\cmd.exe",
"guid": "{0caa0dad-35be-5f56-a8ff-afceeeaa6101}",
"hidden": false,
"name": "\u547d\u4ee4\u63d0\u793a\u7b26"
},
{
"guid": "{b453ae62-4e3d-5e58-b989-0a998ec441b8}",
"hidden": false,
"name": "Azure Cloud Shell",
"source": "Windows.Terminal.Azure"
},
{
"guid": "{2ece5bfe-50ed-5f3a-ab87-5cd4baafed2b}",
"hidden": false,
"name": "Git Bash",
"source": "Git"
},
{
"guid": "{07b52e3e-de2c-5db4-bd2d-ba144ed6c273}",
"hidden": true,
"name": "Ubuntu-20.04",
"source": "Windows.Terminal.Wsl"
},
{
"guid": "{4dd1e689-b517-5f39-947d-78e8a8bdf958}",
"hidden": false,
"name": "Ubuntu 20.04.6 LTS",
"source": "CanonicalGroupLimited.Ubuntu20.04LTS_79rhkp1fndgsc"
},
{
"guid": "{b354a6cc-8ad4-5c18-aa33-9e9c396d8937}",
"hidden": false,
"name": "Developer Command Prompt for VS 2022",
"source": "Windows.Terminal.VisualStudio"
},
{
"guid": "{d2597fe3-a09a-5f6e-bcb8-687179944f24}",
"hidden": false,
"name": "Developer PowerShell for VS 2022",
"source": "Windows.Terminal.VisualStudio"
}
]
},

那怎么实现免输入ssh指令一键登录呢?

简单,只需要在list数组那里加一个元素:

1
2
3
4
5
6
{
"commandline": "%SystemRoot%\\System32\\WindowsPowerShell\\v1.0\\powershell.exe ssh root@xx.xx.xx.xx",
"hidden": false,
"historySize": 9999,
"name": "My Linux Server"
},

其中,commandline内容的后面记得把xx.xx.xx.xx改成你的服务器IP地址。被省略的guid不需要加上。name可以改成其它的名字。

保存之后,重新打开Windows Terminal,就可以在下拉列表那里看到My Linux Server啦!

借此,我们可以简化大量重复的操作

比如,在发布这篇博客时,我就用了上述方法:

留言